Have you ever wondered why a ball stops rolling after travelling a certain length? Did you notice lightning in the sky and wonder how the phenomenon takes place? Or have you ever wondered how a larva turns into an adult butterfly?
Even if you haven’t, your kids surely would have. Children are naturally inquisitive; they want to know all there is to know about the world around them, from how things work to what causes certain events to occur. Since science has become ubiquitous in modern society and is present in almost every aspect of our lives, children these days wish to seek answers to different questions they have in their minds. And you never know, there might be a budding scientist under the roof of your home.
If you really wish to fuel the growth of your child’s scientific mindset, then this blog is for you.
Simply reading out the science concepts from textbooks won’t help your children. Making science fun and engaging requires experimental demonstrations for the kids so that they can witness the phenomena and learn the concepts through practical exposure.
Many science experiments call for unusual, expensive, or inaccessible materials. But don’t you worry about that. We bring some simple, yet impactful scientific experiments and STEM (science, technology, engineering, and mathematics) activities for your kids that can be performed with common household items.
One simple activity might be the spark that ignites your child’s lifelong interest in science. So, what are you waiting for?
Let’s enter the realm of scientific experimentation!
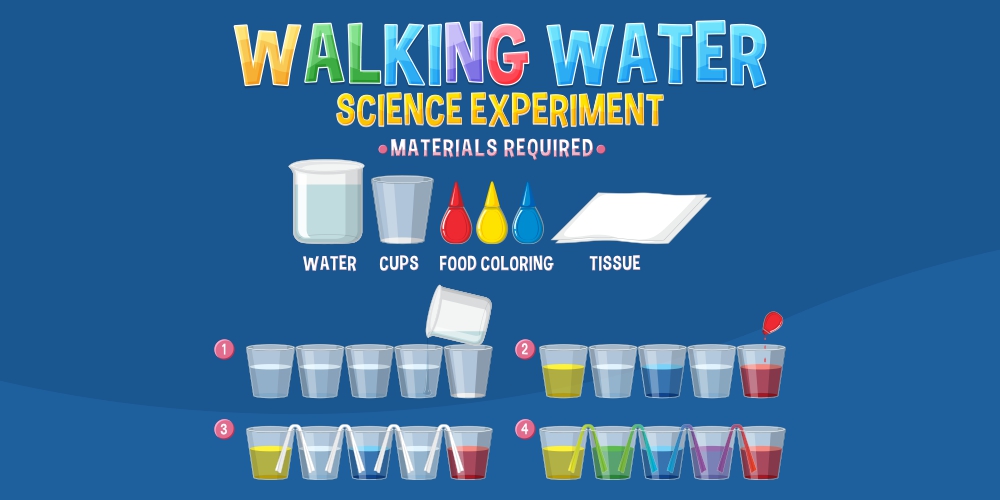
- Walking Water – This vibrant demonstration of capillary action, water movement, and color mixing is simple to set up and execute. Watching the science experiment where color flows through the paper towel on its own will fascinate kids of all ages and teach them about plant nutrition at the same time.
What do you need?
5 transparent glasses, paper towels, and 3 food colors – red, yellow, blue.
Steps Involved:
• Six sheets of paper towels should be folded in half lengthwise first. To get an ideal fit in the glasses, you may need to trim off some length. They need to reach from the bottom of one glass to the next without protruding too much.
• Next, put some red food coloring in the first glass, a little yellow in the third, and a little blue in the fifth. Use a plastic spoon to stir it up. Don’t bother filling the other glasses.
• The colored water is then added to the glasses until they are almost full.
• Put in the paper towels now. Throw the other end of the paper towel into the empty glass next to the red one.
• The colored water will spread almost completely along the length of every paper towel after several minutes. In approximately 20 minutes, you may observe the water’s transformation.
How’s this Happening?
Capillary action causes the colored water to rise up the paper towel. Capillary action refers to a liquid’s capacity to move upward, defying gravity, in small areas. This is what allows water to rise from a plant’s roots to its leafy parts in the treetops.
Paper towels are manufactured from a type of plant fibre called cellulose. In this instance, the water rose through the small pores of the membrane of cellulose. Capillary action caused the water to rise through the towel’s holes.
Due to the mutual attraction between water and the cellulose fibres, the liquid is able to rise vertically against the pull of gravity. Water molecules have a tendency for sticking to the paper towel’s cellulose fibres. It’s called adhesion when something sticks together like this. Cohesion refers to the mutual attraction and sticking together of water molecules. As the water trickles up the paper towel fibres, the cohesive forces aid in attracting additional water to the top, changing the white paper to the colored one.
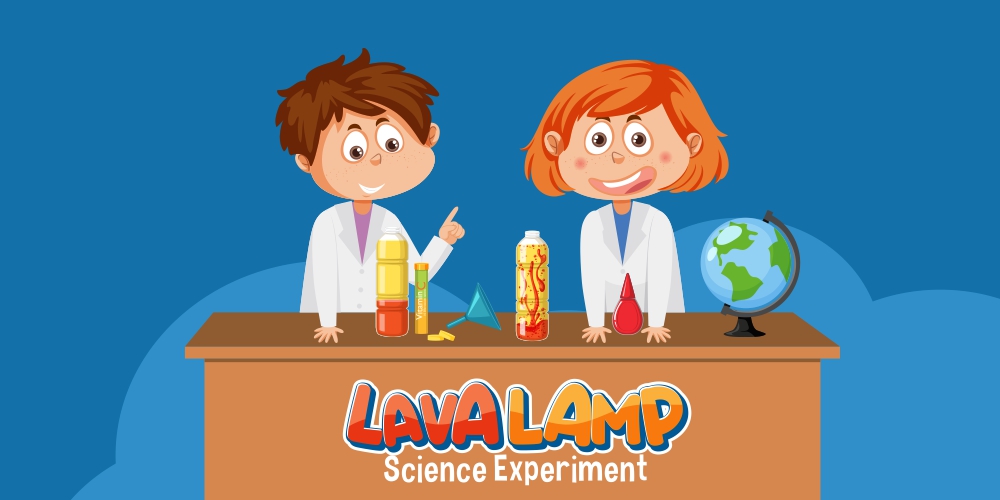
2. Blobs in a Bottle (Lava Lamp) – The lava lamp demonstration is super cool and awesome! Watching a creative lamp with colored water and oil is a fun science experiment for youngsters, but there’s a secret element that will make it more engaging for your kids. This simple experiment utilizes everyday items to help children learn about the concept of density, and it also forms a great science project idea.
What do you need?
A transparent plastic bottle/glass jar, a transparent cup, vegetable oil, food color, vinegar, baking soda, and a torch/flashlight.
Steps Involved:
• Put some baking soda at the base of your container. Vegetable oil should be used to fill half the remainder of the container/jar. If you have a funnel, use it. Take note of how the two are kept apart.
• Put some food coloring in a separate cup and add about a fourth of a cup of vinegar. Mix the two.
• Carefully add the food coloring and vinegar to the oil.
• Finally, turn out the lights, grab a torch, and enjoy a nighttime show from your lava lamp.
How’s this Happening?
The lava lamp science experiment discusses the density of two liquids as well as their solubility in another liquid. Due to its lower density in comparison to water, oil is able to float on the surface. Because the food coloring has identical density as water, it descends through the oil and combines with the water. Carbon dioxide gas is produced while baking soda mixes in vinegar.
Since gas is less dense than water, it rises to the surface, carrying the tinted water with it. The blob of colored water sinks after the air is released from within it. This cycle continues, producing an effect of a lighted lamp when seen under the beam of light.
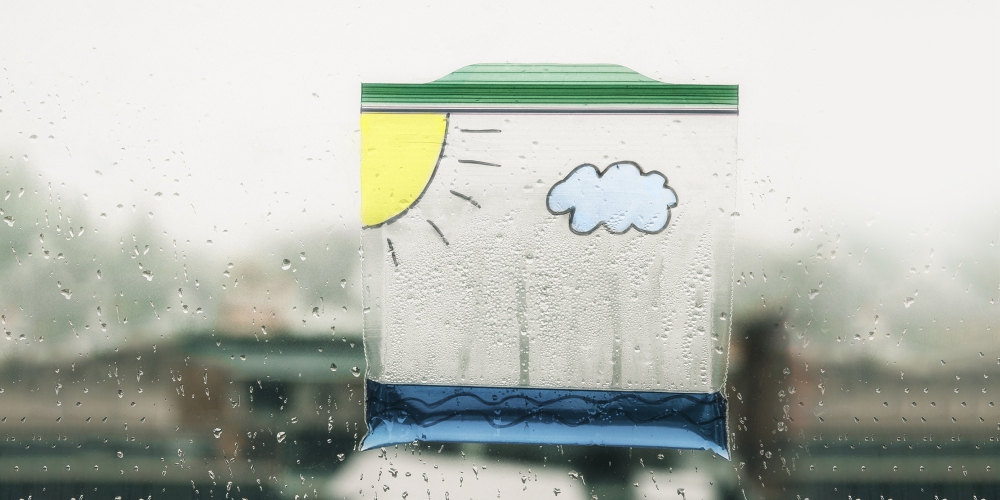
3. Water Cycle in a Bag –
Isn’t it strange to even think of experiencing a water cycle in a small bag? It might sound complicated; it is actually not! Let us simplify it for you!
What do you need?
Bag with a zip lock, water, a permanent marker, food color (blue), clear transparent tape
Steps Involved:
• Create a sky on the top part of your ziplock bag with a permanent marker. Make sure to give it a creative touch by drawing clouds and the sun.
• Then, put a few drops of blue food coloring into a cup of water. Your children will be able to see the water better this way. Blend it until you get a vibrant blue hue.
• The next step is to fill around one fourth of the bag with water and seal it to prevent any spillage.
• Now place your bag in a bright window to dry. Tape the corner down so it won’t slide around.
• You may check on your bag in a couple of hours, and then again in roughly a day. Water drops will begin to adhere to the bag’s surface at some point. Some will be floating in the air like “clouds,” while others will fall from the sky like rain.
How’s this happening?
Because of the sun’s warmth, the water in the pouch is evaporating and becoming a gas. This also occurs in the atmosphere we live in. The water in the bag condenses back into a liquid because it is trapped with nowhere to go. We refer to this as condensation. This science experiment shows how sunlight may change the state of water.
As you can see, simple items found around your house or school may be transformed into fantastic scientific project ideas for your children. Making science fun for kids can be a great way to foster their curiosity and interest in the subject. By creating a learning environment that is interactive, stimulating, and exciting, you can help kids develop a lifelong love of science. So, until we bring you more such activities, make your kids practice these science experiments and give them hands-on experience with the concepts.
